Analytic Accounting in Odoo: Tracking Cost and Profit by Project or Department
An APAA guide to setting up analytic plans, accounts, and distribution models in Odoo so Hong Kong SMEs can see cost and revenue by project, department, or cost centre — not just by account type.

At APAA, one question separates the Hong Kong SMEs that simply keep books from the ones that actually run their business on the numbers: "Which of our projects is actually making money?" A standard chart of accounts cannot answer that. It tells you what you spent on — rent, salaries, marketing — but never which project, department, or client that spending served.
Analytic accounting is how Odoo closes that gap. It lets you tag the same transactions a second way, by purpose, so you can slice cost and revenue across whatever dimension matters to you. This guide walks through enabling it, building your structure, and automating the day-to-day tagging so your team is not doing it by hand forever.
What Analytic Accounting Gives You
Think of your chart of accounts as the vertical view — transactions grouped by their nature. Analytic accounting adds a horizontal view — the same transactions grouped by purpose: a specific project, a department, a cost centre, a client engagement.
With both views in place, questions that used to require a spreadsheet exercise become a single report:
- How much did utilities cost us last quarter?
- Is this project actually profitable?
- How does real spending compare against the budget we set?
Turning It On
The analytic features are off by default, so enable them first:
- Go to Accounting > Configuration > Settings.
- Search for "Analytic".
- Enable Analytic Accounting.
- Save.
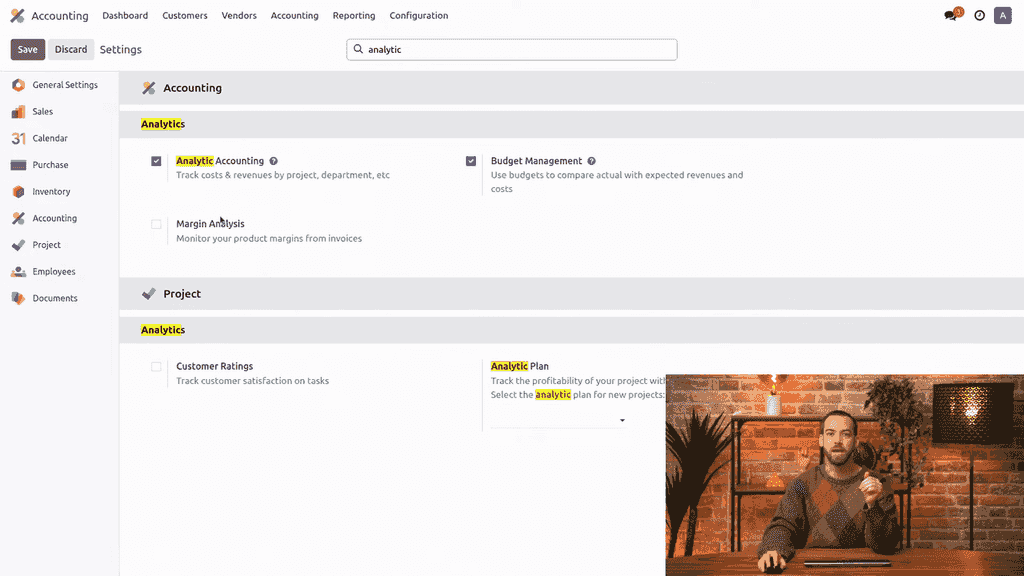
From then on, analytic fields appear on journal items right across the system.
Building Analytic Plans
A plan is the container that groups related analytic accounts and controls when they show up on journal entries.
To create one:
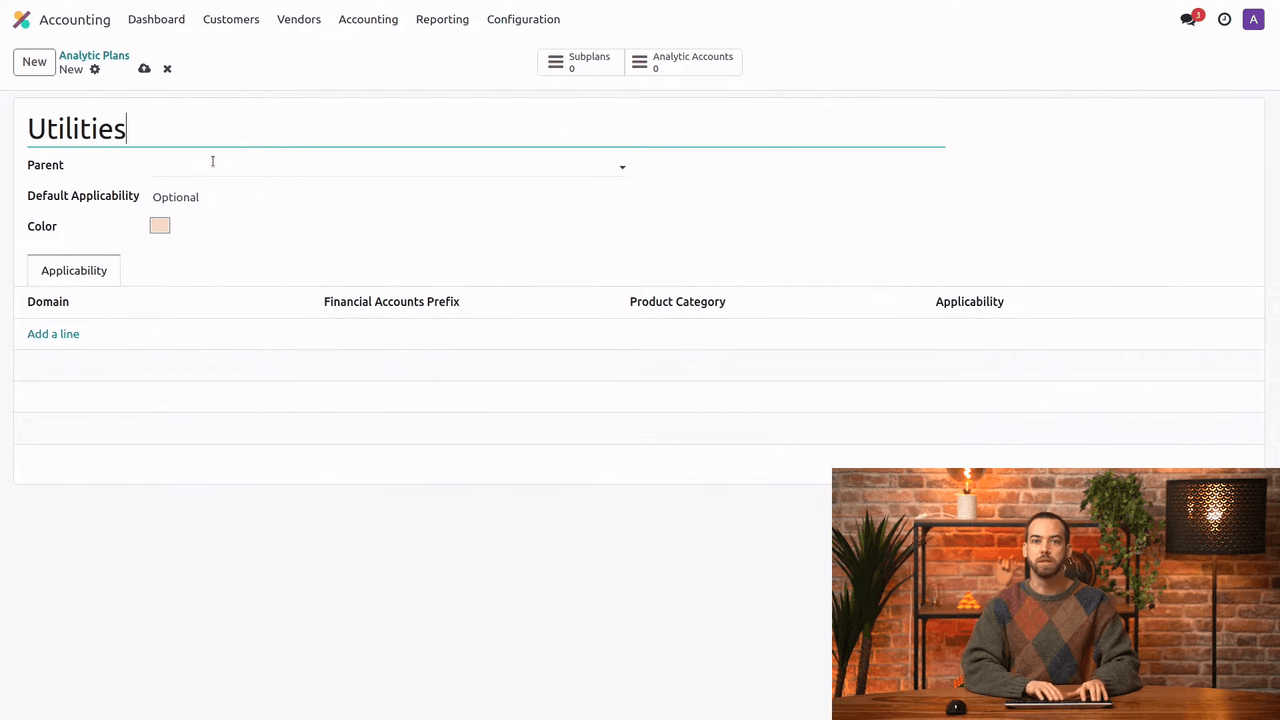
- Go to Accounting > Configuration > Analytic Plans.
- Click New.
- Give it a name (we will use "Utilities" as the example).
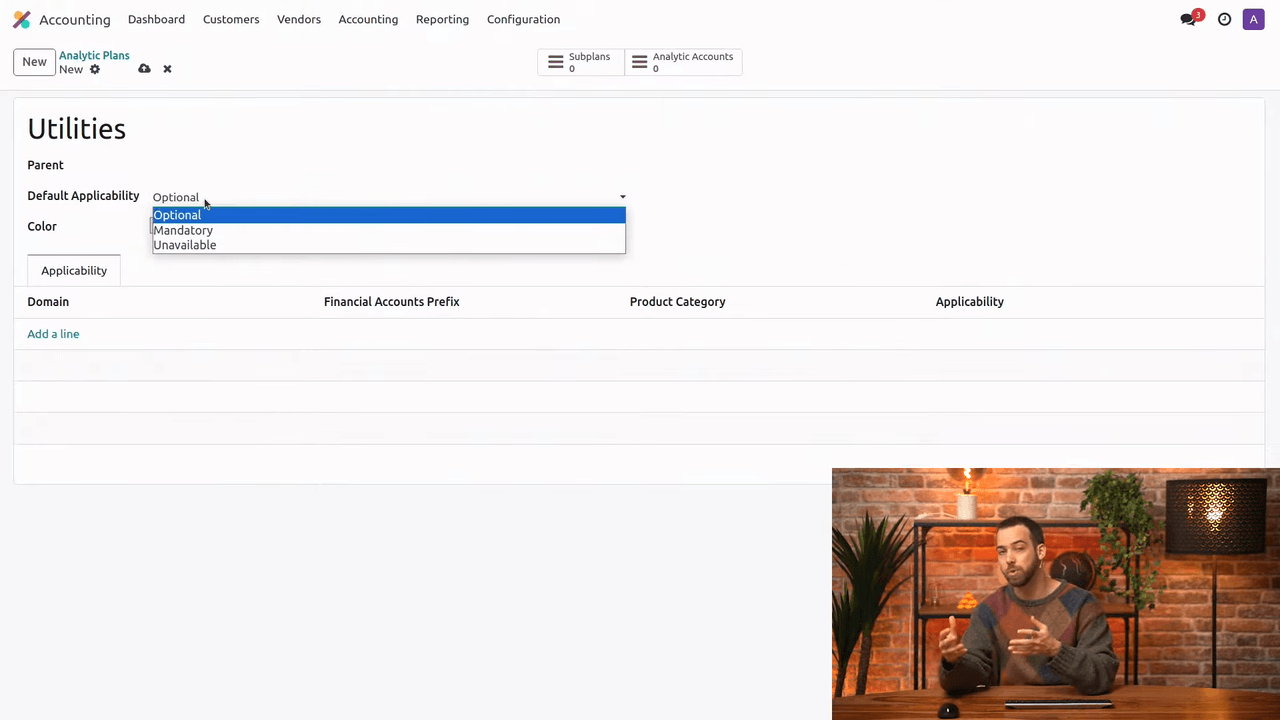
- Set the Default Applicability — this decides whether the plan is optional, mandatory, or hidden on journal items.
How Applicability Behaves
| Setting | Behaviour |
|---|---|
| Optional | Users may add an analytic distribution, but are not forced to |
| Mandatory | Users must assign a distribution before confirming, and it must total 100% |
| Unavailable | The plan does not appear on journal items at all |
For the clients we set up, Mandatory on the plans that drive their key reporting is what keeps the data complete — nobody can confirm a bill while leaving the cost untagged.
Narrowing Where a Plan Applies
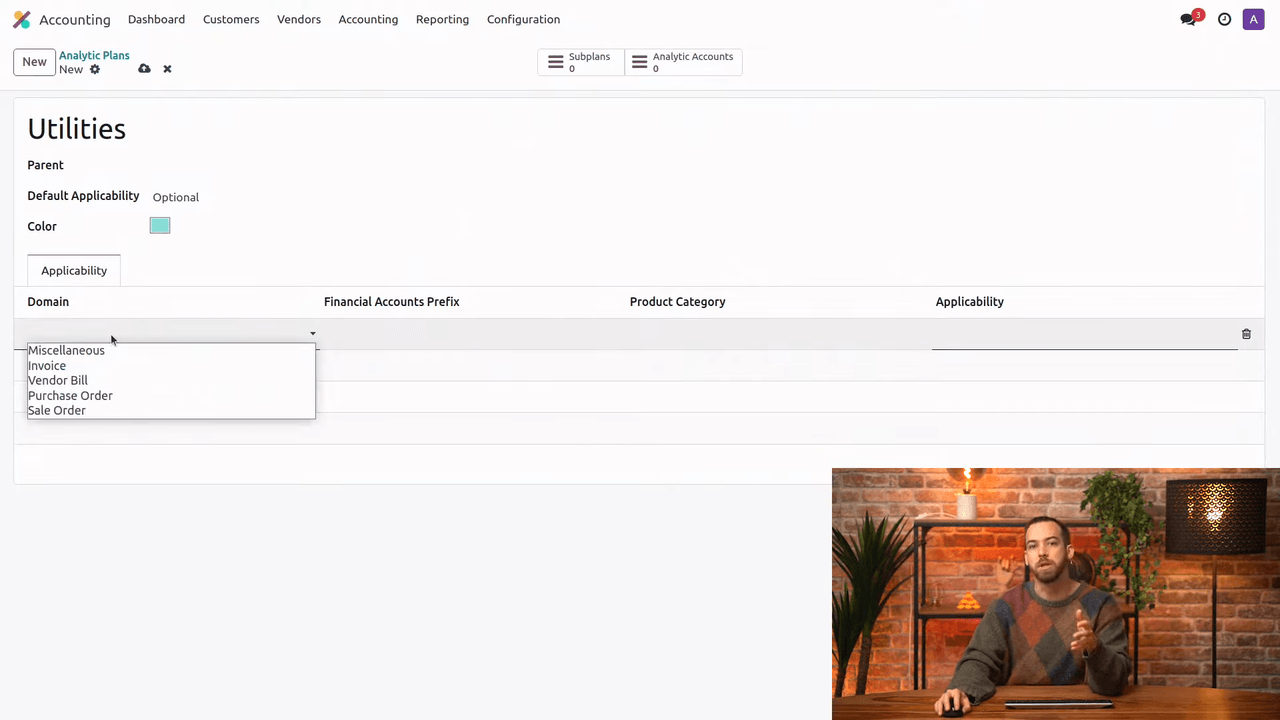
You can override the default for specific situations using the domain section at the bottom of the plan form:
- Document type — different rules for vendor bills versus customer invoices, and so on
- Account prefix — target only lines posted to accounts starting with a given code
- Product category — restrict to particular product categories
Sub-Plans for Deeper Structure
The Sub Plans smart button lets you build parent-child hierarchies — handy when an organisation needs cost tracking at more than one level (for example, division, then department within it).
Creating Analytic Accounts
Analytic accounts are the individual tags you actually assign to journal entry lines.
From inside a plan, click the Analytic Accounts smart button, then New:
- Name — a descriptive label (e.g. "Electricity", "Internet", "Gas")
- Customer — optionally link it to a partner
- Reference — an internal code
- Currency — defaults to the company currency, but can be changed
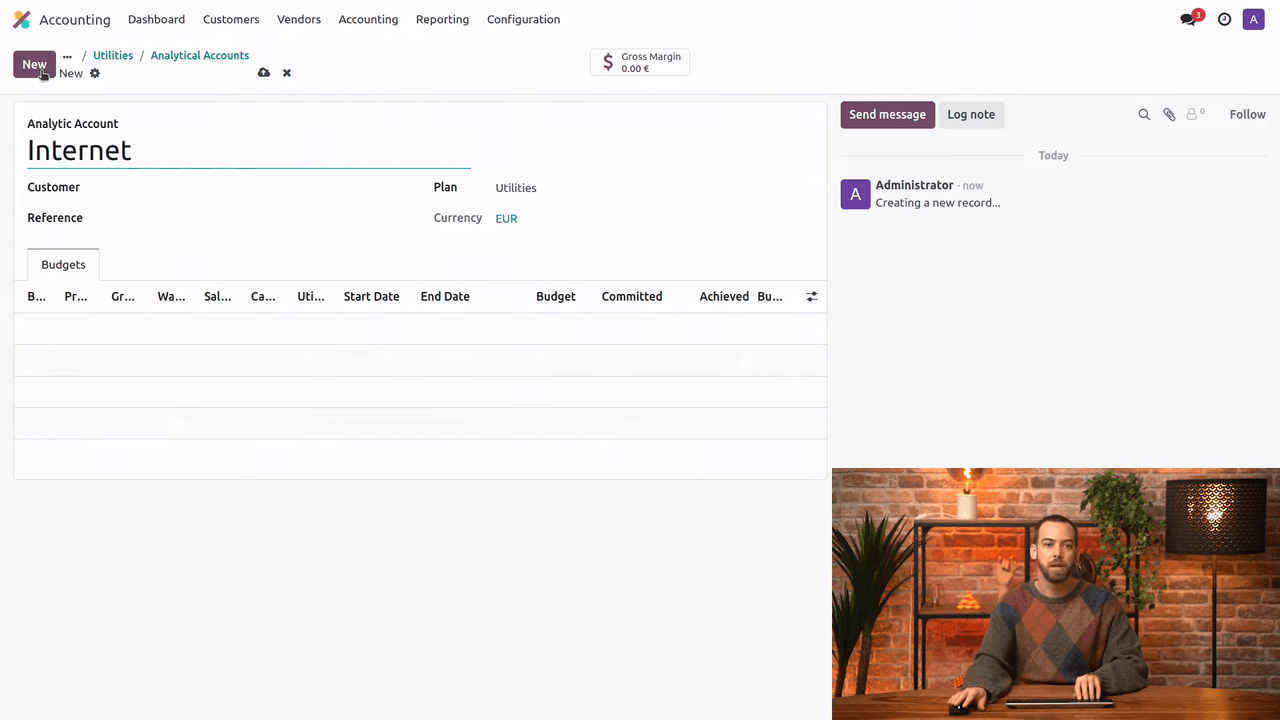
Create accounts from within a plan and the plan field is filled in for you automatically.
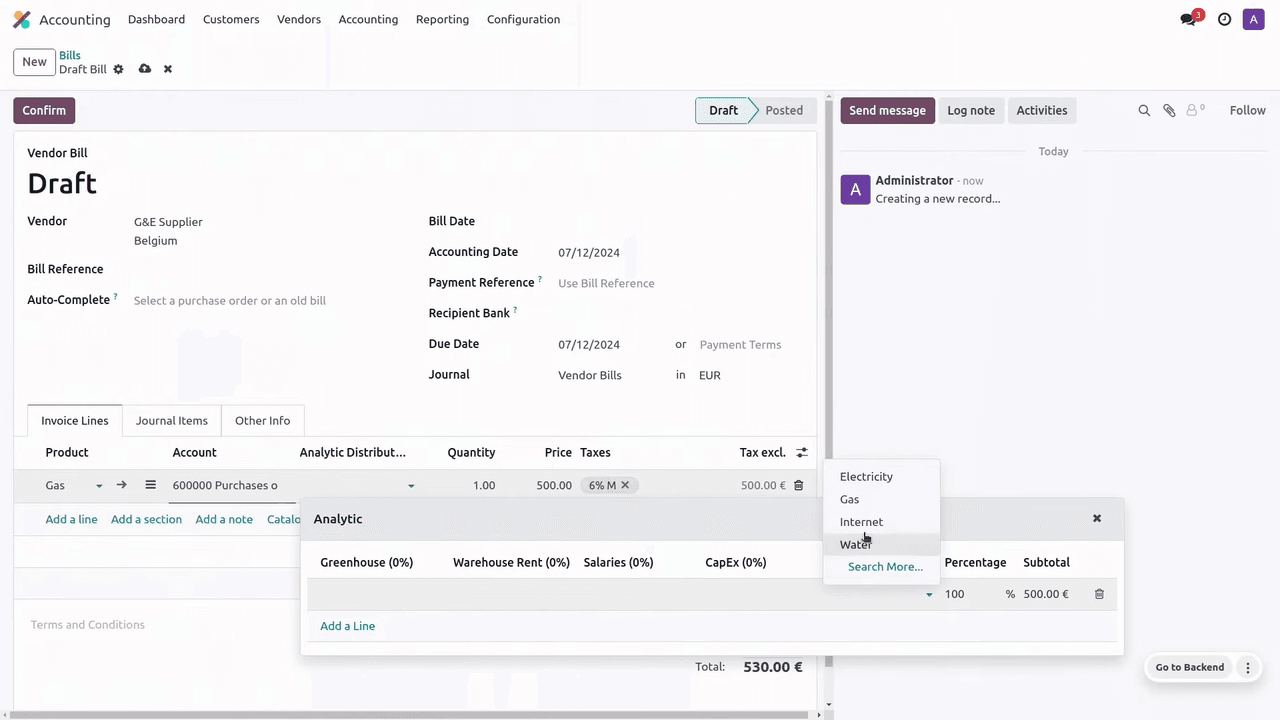
Applying a Distribution on a Vendor Bill
Every line of a vendor bill can carry an analytic distribution:
- Go to Accounting > Vendors > Bills and click New.
- Choose the vendor and add a line.
- In the Analytic Distribution column, pick the plan and account.
- Set the percentage (usually 100% for a single account).
- Confirm the bill.
If the plan is Mandatory, Odoo refuses to confirm until every line carries a valid distribution totalling 100%.
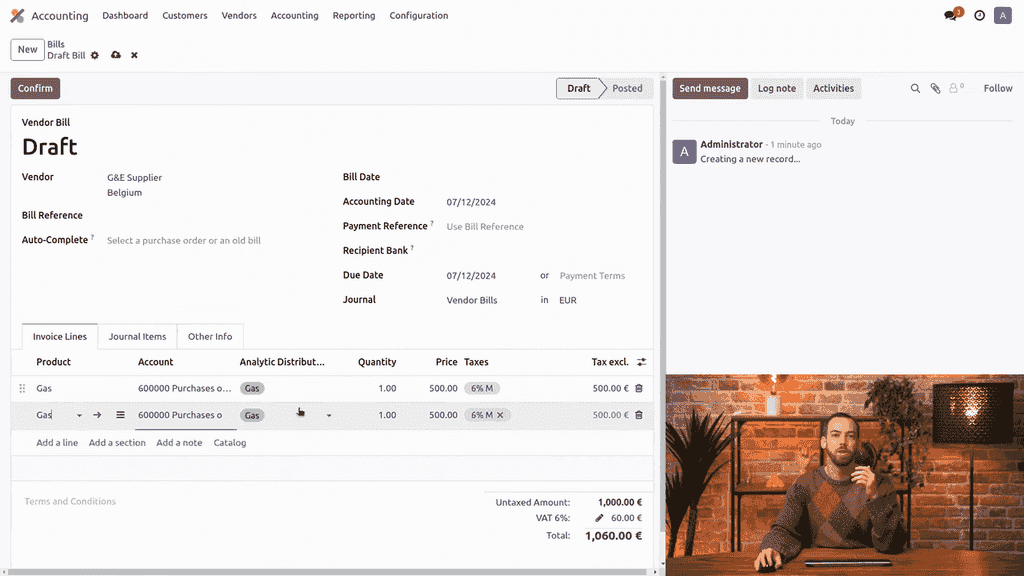
Splitting a Cost Across Cost Centres
A single line can be spread across several analytic accounts. An office-supplies bill, for instance, might split 60% to Marketing and 40% to Operations. For mandatory plans the percentages must still add up to 100%.
Automating It with Distribution Models
Tagging every line by hand does not scale. Distribution models apply the assignment for you, based on criteria you define.
To create one:
- On a vendor bill line, set the analytic distribution.
- Click Save as Model.
- Define the matching criteria: vendor, product, account prefix, or product category.
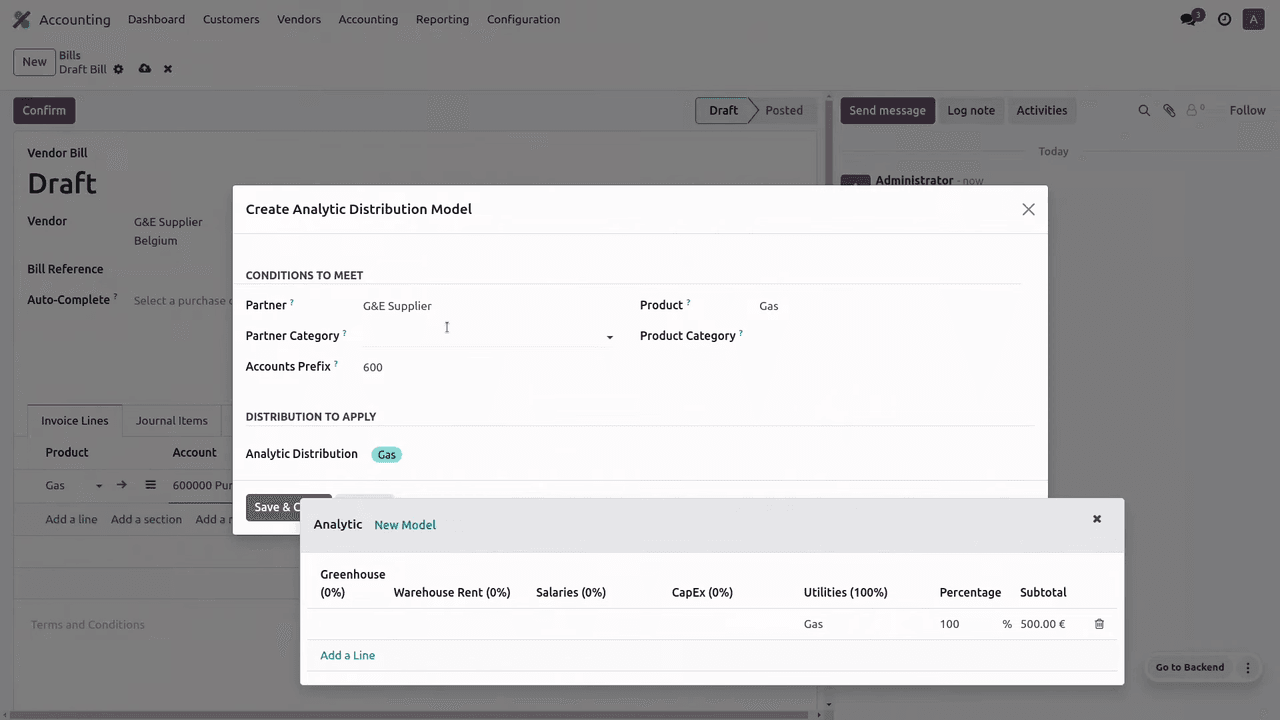
Next time a line matches those criteria, Odoo fills the analytic distribution in automatically.
For recurring suppliers — your landlord, your internet provider — this means the cost lands in the right cost centre with zero manual effort.
Fixing Historical Entries in Bulk
You cannot edit the analytic distribution directly on a confirmed bill or invoice. You can, however, update the journal items underneath:
- Go to Accounting > Journal Items.
- Group by Partner to find the relevant entries.
- Filter by the target expense account.
- Select the lines you want to change.
- Use mass edit to assign the analytic plan and account.
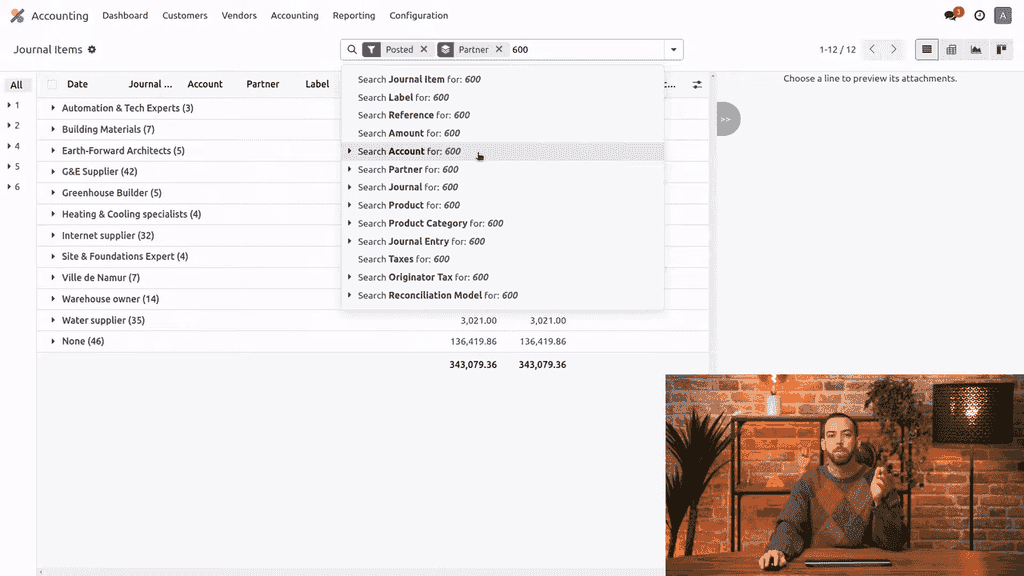
This is the route we use when a client switches analytic accounting on partway through the year and wants the back-history tagged too.
Reading Your Analytic Data
Odoo gives you a dedicated view to analyse all of this:
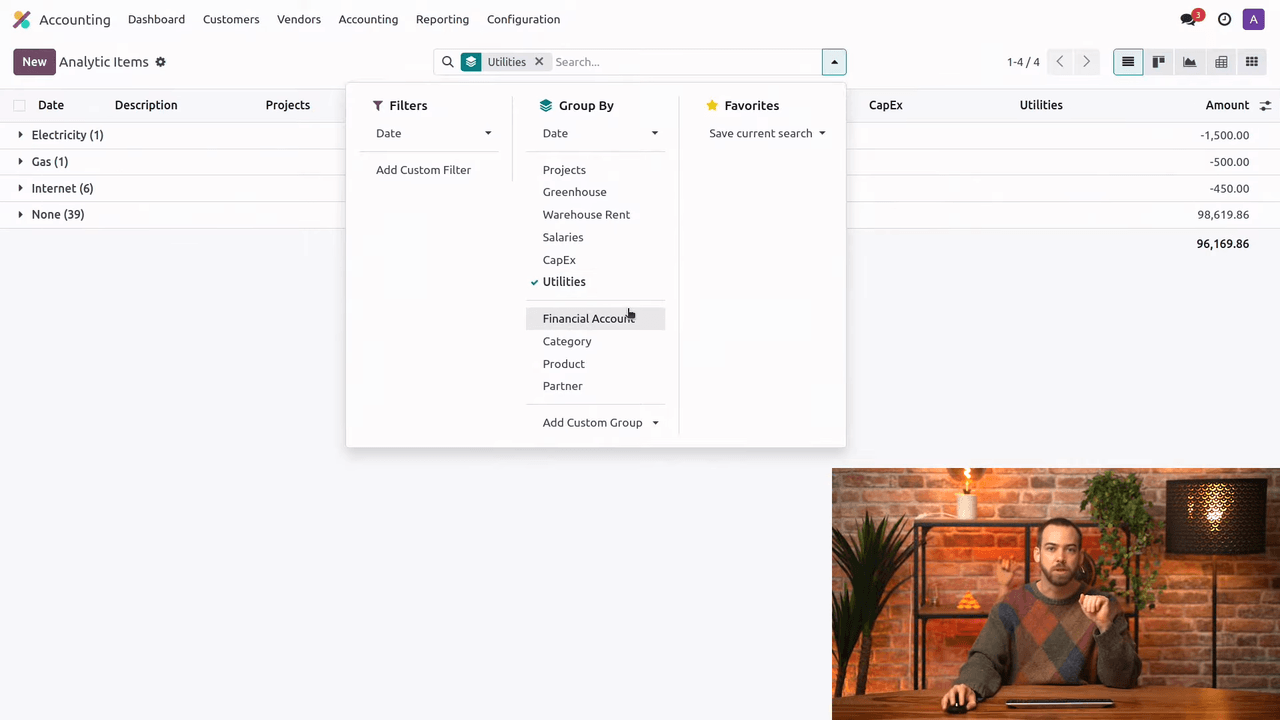
- Go to Accounting > Analytic Items.
- Group by analytic plan to see totals per category.
- Switch to Pivot View for a spreadsheet-style breakdown.
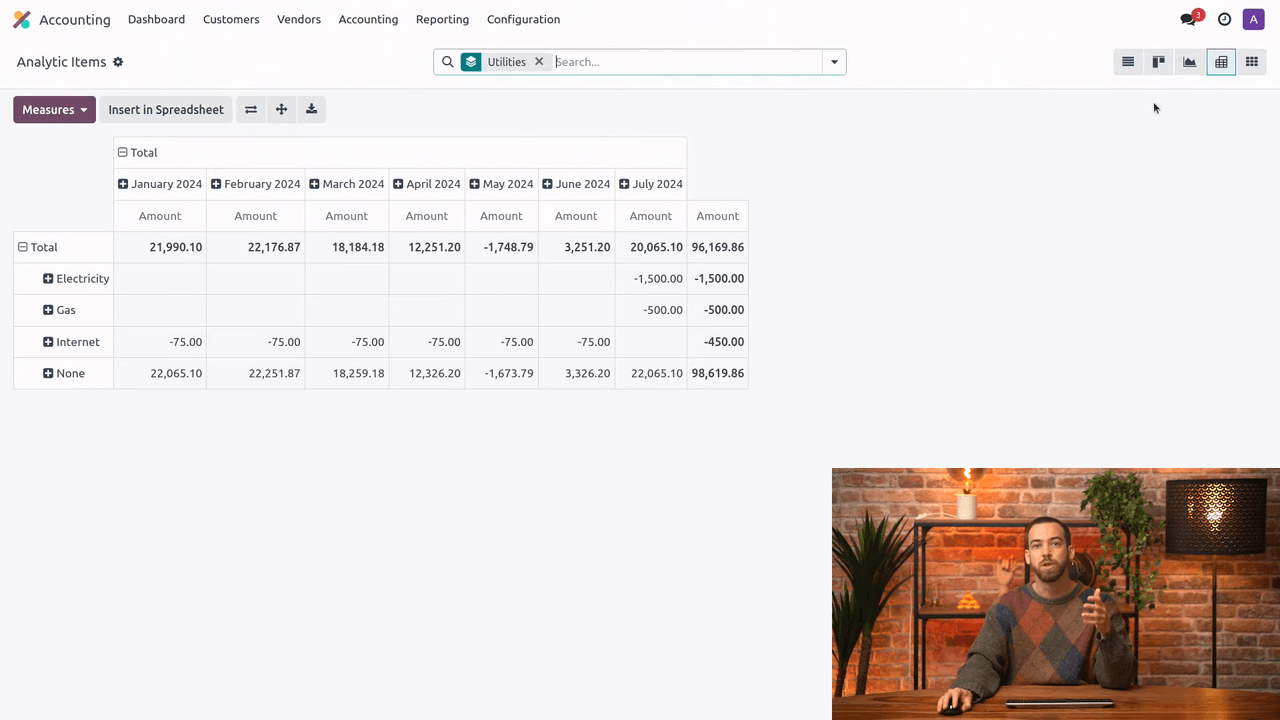
This is where the payoff shows up — you can finally watch spending patterns and compare actuals against budget at a glance. Pair it with Odoo's budget management and you have proper financial planning, not just record-keeping.
A Sensible Place to Start
For most Hong Kong SMEs we recommend the same first moves: set up analytic plans for your real cost centres — departments, projects, locations — make the critical ones mandatory, and create distribution models for every recurring vendor bill so the tagging is automatic. Then review the pivot view in Analytic Items once a month, and connect it to Budget Management to set targets you can actually track against.
If you would like APAA to design an analytic structure that fits how your business is actually organised — and automate the tagging so your team is not burdened by it — reach out to our Odoo team.